April 18, 2019
How to Add Words to the Back of A Cap
Add an extra touch of branding to a baseball cap by embroidering text down its vertical seam.
Highlights:
- Use a light-density fill behind your letters.
- Pull out the cap’s facing and label before sewing.
- Use two layers of 1.5-ounce tearaway backing for stability.
Baseball caps are a staple in the decorated-apparel industry. Though there are different styles – from snapback to trucker to five-panel – the true key to standout headwear is decoration. Joyce Jagger, The Embroidery Coach, explains how to embroider lettering down the vertical seam of a baseball cap to increase the wow factor of this classic accessory.
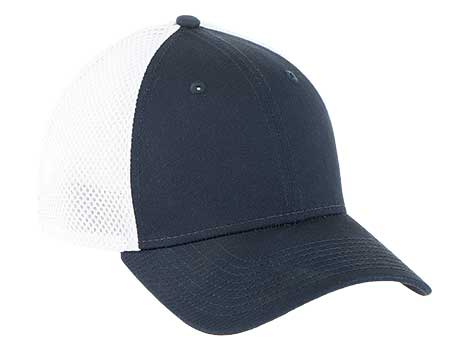
1. Select a baseball cap. For this particular design, a fitted mesh baseball cap provides the best canvas, as it has the appropriate amount of stretch and space for vertical lettering.

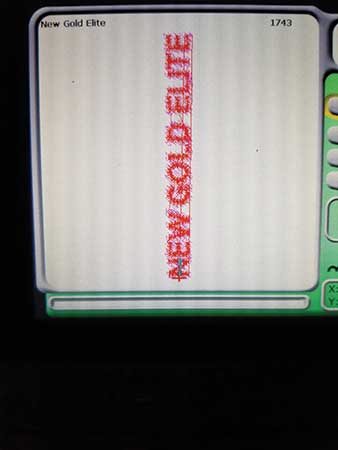
2. Create the design. Measure the length of the space where the design is going to be sewn – this design is 2.5 inches long – and create the lettering with a sewing sequence of left to right. The design will need a light-density fill behind the letters, which can either be a contrasting color or blend with the cap. You will also need to decide whether the fill is the same shape as the lettering or if you want to create a different backfill for a layered effect.

3. Upload the artwork. Upload your design into the machine and turn it 270 degrees, so the embroidery begins at the centerline of the seam – at the top of the lettering – and sew vertically down the seam. This design’s starting point is on the outside center of the letter “N.”

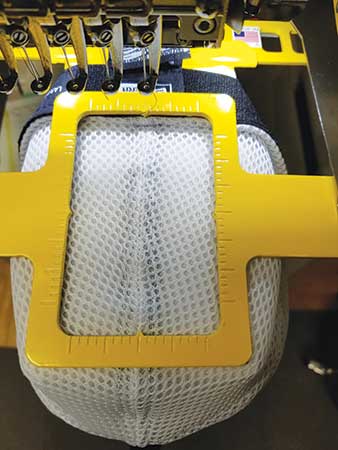
4. Hoop the cap back. Using a hooping system with a rectangle clamp (2.5-inch-by-4-inch window), place two layers of 1.5-ounce tearaway backing on the bottom of the clamp. Tape it in place at the front to keep it from sliding as you hoop the cap back. Line up the center of the back seam with the center of the clamp. The seam must be straight, and the bottom of the cap lined up with the back edge of the clamp. Be sure to pull out the facing and the label.

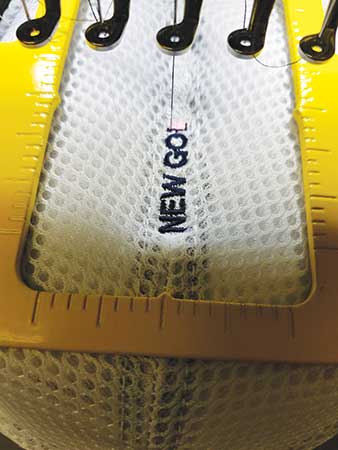
5. Sew the design. Embroider the design on the cap, trim the threads and remove the backing.


Product Hub
Find the latest in quality products, must-know trends and fresh ideas for upcoming end-buyer campaigns.