August 28, 2018
How To Customize Your Lanyards
You can embroider tiny logos or small block text onto lanyards to give brands an extra promotional boost.
Highlights:
- For a crisp, clean appearance, be sure your text is centered on the lanyard.
- Encasing the lanyard in layers of water-soluble stabilizer will ensure it doesn’t shift during sewing.
- All-cap block letters are best for readability.
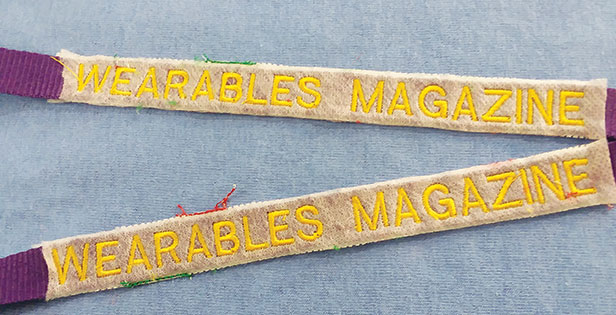
Embroidered lanyards are the perfect giveaway for trade shows or as part of a new employee’s welcome packet – consider them for any occasion where name badges are a necessity. Lydia Young, owner of Just 4 YOU Embroidery in Fort Wayne, IN, started embroidering on lanyards after perfecting a similar process for embellishing ribbons. “Businesses are buying embroidered lanyards to promote and advance their footprint and give them more visibility,” she says. “One businessman is ordering more because his grandchildren have started using them to attach their keys and other small items. He loves it because they’re now helping him advertise.”
Step 1: Create A Template

Young recommends using your software to digitize a 7-inch-long horizontal red line with a quarter-inch tab in the center. Copy the line, flip it and change the color to green. Move the green line so the distance between the two lines is an eighth-inch wider than the lanyard you’ll be sewing. Combine the two lines, copy and flip them. Bring the red tabs in the center together to create a master design. Add a tiny logo and text that’s 3/16 of an inch shorter than the lanyard’s width. Be sure to center the text between your guidelines. “Block capitalized text works best,” Young says.
Step 2 & 3: Prepare Your Embroidery Hoop and Secure the Lanyard

[At left] Secure two layers of water-soluble stabilizer in a hoop that’s at least 8-by-5 inches. Then cut another layer of stabilizer that’s 2 inches longer and 1 inch wider than the lines in your template. Tape the third layer on top of the first two and stitch your red lines.
[At right] Remove the hoop from the machine and pull the third layer of stabilizer and tape up. Place the lanyard snug against the red guideline and replace the stabilizer and tape. Make sure your lanyard is even and right-side up. Secure the clips at the bottom of the lanyard so they don’t get caught in your machine. Then, stitch the green lines to encase your lanyard. “The lanyard needs to be in a precise position so it doesn’t move during sewing,” Young says.
Step 4: Embroider & Finish the Lanyard
Start your machine slower than normal to make sure the text is centered between the guidelines. Once you’ve finished stitching, remove the hoop and cut away excess stabilizer. Trim your threads, soak the lanyard in warm water, rinse it and lay it flat to dry.